
How to Set Up a CDN
Putting a CDN in front of your site takes about five minutes: create a deployment, point it at your origin, and update one DNS record. Here's the full walkthrough.
Before you start
A CDN sits between your users and your origin server, caching content at edge locations so most requests never touch your infrastructure. To set one up you need three things: an account with a CDN provider, a domain or subdomain you want to serve through the CDN (with access to its DNS settings), and an origin — the place your content actually lives, whether that's a web server, an S3-compatible bucket, or any URL that serves your files.
The steps below use Edge CDN, where the free tier covers 3 deployments and 500,000 requests a month, but the process is broadly the same on any provider. The getting started documentation covers the same flow with screenshots.
Step 1: Create an account and a deployment
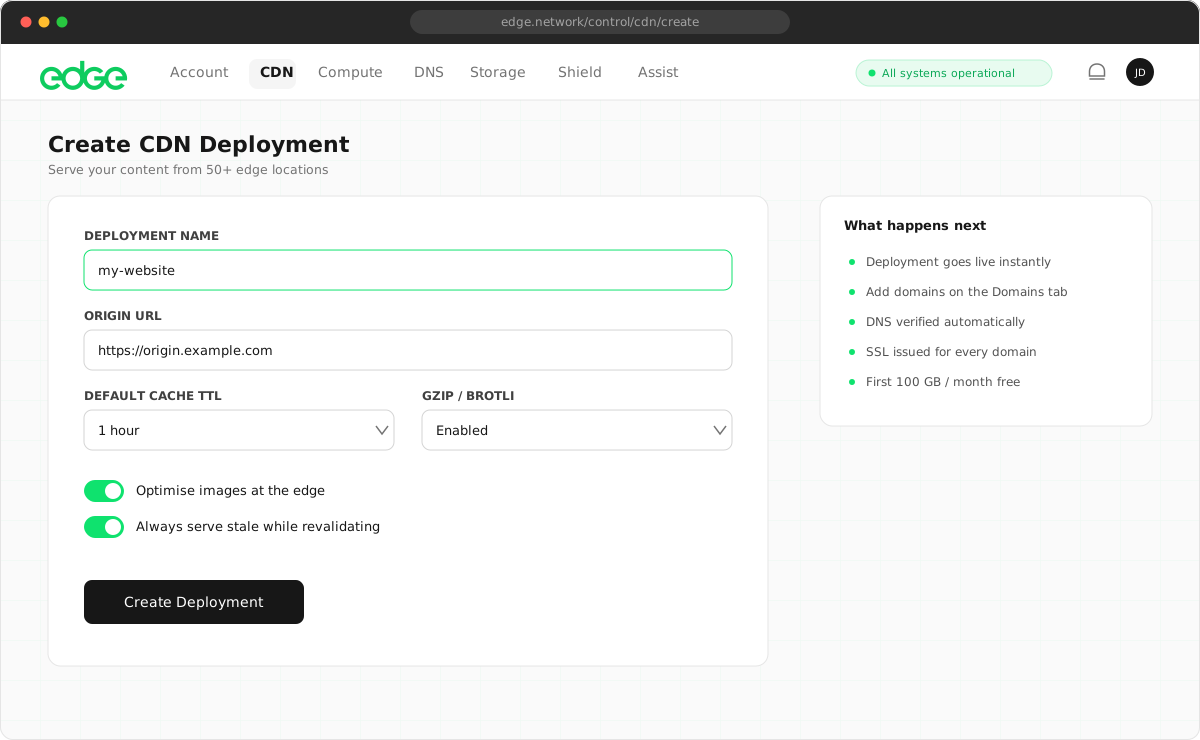
Sign up for an account, then navigate to CDN in the sidebar and click Deploy CDN. A deployment is a container for your CDN domains — you might have one per project or per environment. Give it a name (for example "Production") and click Create Deployment.
Step 2: Add your domain and origin
Click Add Domain and enter the domain you want to serve through the
CDN — say cdn.yoursite.com — along with your origin URL, such as
https://origin.yoursite.com or an S3 bucket URL. The origin is where
the CDN fetches content it doesn't yet have cached.
If you're hosting a static site, you can use an
Edge Storage bucket as
the origin type instead: upload your files, and the CDN serves them directly —
including index.html for directory paths — with no web server to run
at all.
Step 3: Point your DNS at the CDN
At your DNS provider, add a CNAME record for your subdomain pointing to
cdn.edge.network. For cdn.yoursite.com, that means a CNAME
with name cdn and target cdn.edge.network. For a root
domain, use your DNS provider's CNAME flattening or ALIAS record support.
Propagation usually takes one to five minutes. Then click Check DNS in the console to verify the record. If you manage your zone on Edge DNS, changes propagate globally in under five seconds.
Step 4: Wait for SSL — then you're live
Once DNS is verified, a free SSL certificate is issued automatically via Let's Encrypt — typically within 30 to 60 seconds. When the status shows SSL: active, your domain is being served through the CDN over HTTPS. No certificate files to manage, and renewal is automatic.
Step 5: Configure caching rules
Out of the box the CDN caches sensibly, but path-based cache rules let you tune
behaviour per content type: long TTLs (7–30 days) for static assets like
/assets/*, *.js, and *.css; long TTLs with
image optimisation enabled for /images/*; and short TTLs or a bypass
for /api/* and personalised pages. Our
Caching Strategies guide
covers the reasoning in depth.
Step 6: Test, and purge when you need to
Verify everything is working with a quick header check —
curl -I https://cdn.yoursite.com/path/to/file.jpg — and look for
x-cache: HIT, which confirms the response came from cache. When you
deploy new content, use instant cache purging from the console to invalidate stale
files; on Edge, purges take effect in under a second.
What a CDN gives you from day one
Once traffic flows through the CDN, these benefits apply immediately.
Faster loads everywhere
Content is served from the node nearest each user rather than from a single origin, cutting latency worldwide.
Less origin load
Cached requests never reach your server, so you can run smaller infrastructure and survive traffic spikes.
Built-in protection
DDoS mitigation and automatic SSL are included — attack traffic is absorbed at the edge before it reaches you.
Real-time analytics
Traffic, cache hit rates, and geographic distribution are visible from the console as they happen.
Set up your CDN now
Free for 3 deployments and 500k requests a month, with automatic SSL and zero egress fees.